
A step-by-step guide to planning, designing, and installing a custom closet (plus cost estimates and layout ideas!)
A closet remodel covers several distinct phases: clearing the space, taking measurements, designing a layout, choosing materials and components, and installation. This guide walks through each step with enough detail to help you plan the project and make decisions before you start spending money. If at any point you want to hand the work off to a professional, we cover that too.
Before any design or installation work can happen, the closet needs to be cleared out and the space prepared. This phase covers decluttering, cleaning, and painting, which is the groundwork that everything else builds on.
Start by removing everything from the closet. This gives you an accurate read on what you own, how much space it actually requires, and what the storage problem really is. Decluttering before measuring means your new layout is designed around what you’re actually keeping, not what you’re currently storing out of habit.
Sort what comes out into two groups: what’s going back in, and what isn’t.
For items you’re keeping:
For items you no longer need:

With the closet empty, clean the walls, floor, and any remaining fixtures. If you’re painting — which is easier to do now than after installation — wipe down the walls first, let them dry, and apply paint before anything goes back in.
On color: a neutral that reads clean under artificial light is usually the right call. White, off-white, and light gray all work. Darker colors can work in a larger closet with good lighting; in a small one they tend to make the space feel compressed. The custom closet components will be the visual focus anyway — the wall color is background.
What remodeling options will help me keep my clothes off the closet floor for good?
If clothes on the floor are a recurring problem, the issue is usually a lack of designated space rather than habits. A built-in laundry hamper removes the decision of where dirty laundry goes. Extra hanging rods and a wardrobe lift address the overflow that ends up draped over things or dropped on the floor.
The actual remodel breaks into four phases. How much of it you handle yourself and how much you hand off depends on your budget, timeline, and how involved the project is.
Start with measurements: ceiling height at multiple points, closet width and depth, and the location of any doors, windows, outlets, or vents. These determine what can go where. A sloped ceiling, for example, limits where rods can be placed and where tall shelving units will fit.
From measurements, you can draft a basic floor plan yourself on paper or using a free tool. For a larger walk-in or a complex configuration, working with a professional designer who renders a 3D model such as Closet America tends to surface problems — a drawer that blocks the door swing, a hanging section that’s too shallow for coats — before anything is ordered.
When deciding how, exactly, to remodel your closet, think about the four major areas you’ll need to consider in your design.
Walls can be used in so many ways. Functionally, they can hold adjustable shelving or support wardrobe lifts and hanging rods. Aesthetically, tasteful wall decor or an accent wall can take your closet design game to a whole new level.
Are you happy with your closet ceiling? You may want to consider changing the color or texture of your ceiling to better suit your tastes. Or, you might want to add to or change the lighting, perhaps install some dotted LED lights—or even a chandelier!
Are you tired of vacuuming a dusty closet floor—or maybe you’d prefer the warmth and coziness of carpet over tile? Now’s the time to think about textures and colors for your new closet floor—as well as decor options like area rugs.
If your closet doesn’t have a door, you may want to add one, or vice-versa. If you do have one, consider whether it needs to be retouched, repainted, or replaced. You can also add to its functionality by adding chrome hooks or a mirror.
Finalize the layout before moving to the next step. Changes made after components are ordered add cost and delay!
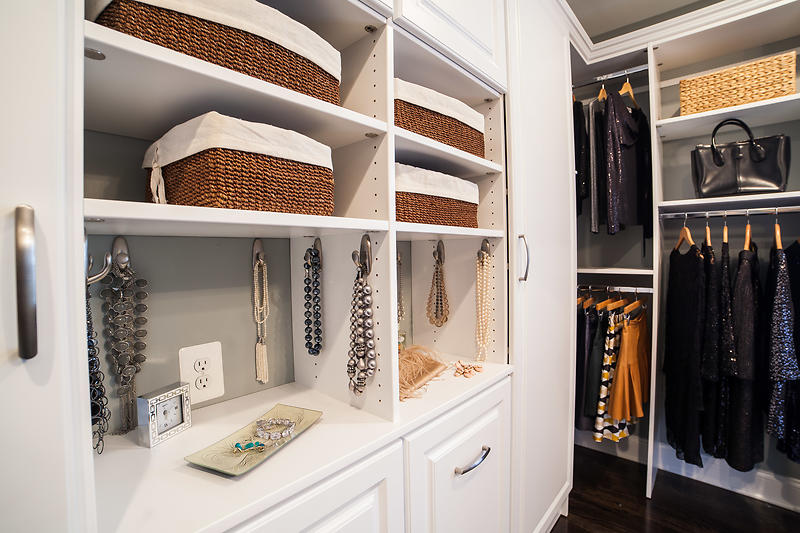
Beyond the core configuration, there are accessories worth considering at the design stage rather than as afterthoughts:
The components you select determine how the system functions and how long it lasts. The main decision is which tier of product to go with — DIY kits, semi-custom modular systems, or fully custom built-to-order — which maps roughly to the cost ranges covered in the section below.

On materials: The key specs to evaluate are shelf material and thickness (3/4-inch thermofused laminate is the standard for professional systems), drawer hardware (soft-close undermount slides last significantly longer than side-mount slides), and whether the system is floor-mounted with leg levelers or wall-hung. Floor-mounted systems are more stable, particularly in older homes with walls that aren’t perfectly plumb.

On choosing a manufacturer: If you’re going custom, a local manufacturer means you can see the product before ordering and have someone accountable if something needs to be corrected after installation.
Is it easier to work with a custom closet designer or renovate my closet on my own with DIY materials?
DIY gives you more control over upfront cost. But a custom installer handles everything after the design is approved — typically completing the install in a single day — and the finished product is built to your exact dimensions with a warranty. And depending on how you value your time, the cost gap narrows when you account for the time a DIY project actually takes. The comparison between custom and DIY systems usually comes down to how much you value your time.
If you’re installing a DIY kit, read the instructions fully before starting!
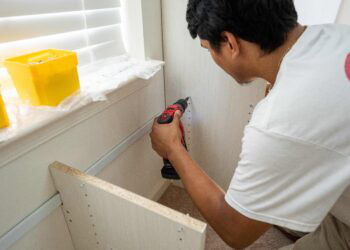
Most kits require wall anchoring at specific stud locations, and getting that wrong early creates problems that are difficult to fix once components are stacked on top of each other. Clear the room of anything that could be damaged, and plan for the job to take longer than the packaging suggests.

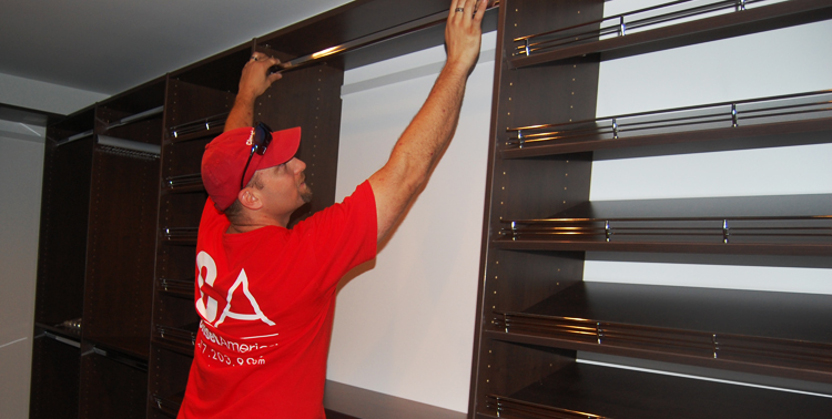
If you’re working with a professional installer, the process is typically straightforward: they arrive with the finished components, install everything in a single day, and leave the space ready to use. If your closet has an unusual configuration — sloped ceiling, off-center door, exposed plumbing — we’ll flag that during the design phase.
Either way, do a final check against your design plan before considering the job done. Confirm shelf heights match what you specified, drawers open and close smoothly, and any lighting is functioning.
Once installation is complete, put things back deliberately rather than just moving the pile back in. Group by category, put daily items at eye level, and use the storage you designed for the purpose you designed it for. A system that gets loaded haphazardly on day one tends to stay that way.
If you find that something about the layout isn’t working — a shelf is too high, a drawer section is in the wrong spot — note it early. Adjustable shelf pins can be moved. Larger changes are easier to address before the space is fully loaded.

Closet remodel cost varies widely depending on whether you go the DIY route, use off-the-shelf modular systems, or hire a custom manufacturer. Here is a general breakdown of what to expect at each tier:
|
Approach |
Typical Cost Range |
What You Get |
|
DIY (wire shelving, basic kits) |
$100–$500 |
Standard wire or laminate shelving from big-box retailers. Requires self-installation. Limited configuration options; not built to room dimensions. |
|
Semi-custom (modular systems) |
$500–$2,500 |
Pre-made components assembled to fit your space. More finish options than basic kits. May require professional installation for larger projects. |
|
Fully custom (professional design and install) |
$2,000–$10,000+ |
Built to exact room dimensions, configured to your wardrobe and storage needs. Professionally installed. Includes warranty coverage. Price varies by closet size, materials, and accessories. |
The biggest cost driver in a custom closet is size — a reach-in closet remodel costs significantly less than a large walk-in. Secondary drivers are materials (laminate vs. wood veneer vs. solid wood) and accessories (islands, LED lighting, specialty drawers). When working with Closet America, we will provide a written quote after measuring your space so you will have exact pricing before any work begins.
Is a closet remodel worth the cost?
A professionally installed custom closet system adds usable, professionally finished storage capacity, typically installs in a single day, and comes with a transferable warranty. It is also a recognized factor in home resale value. Whether it is “worth it” depends on how often you use the space and how much the current configuration is causing you friction. Both practical and financial considerations matter.
If you’re ready to move from planning to installation, Closet America designs and builds custom closets for homes in the DC, Maryland, Virginia, Pennsylvania, New Jersey, Delaware, and North Carolina markets. Every system is built to order at our Landover, MD facility and installed by our own team, typically in a single day. The transferable warranty covers labor and materials for the life of the installation.
Schedule a free design consultation to see a 3D rendering of your space and get a written quote with no obligation. Or contact us with questions.


